In this tutorial, you will learn everything you need to know about Pocket Code to start creating your first project. We will guide you step-by-step on how to download the app, open it, and create a new project.

This is the very first tutorial, and you don’t need any prior knowledge.
So, what are you waiting for? Grab your phone and get started now!
Here you can download the tutorial in PDF-format:
- Installation of Pocket Code
At first, you need to install the Pocket Code app on your device. You can find the app by searching “Pocket Code” in the Google Play Store and download it by hitting “install”. For this step a Google Account is required. Now your device will download and install the app. This step may take a while according to your internet connection.

After successfully downloading and installing Pocket Code you can find the app in the app drawer or on your home screen, depending on your device. You can easily take the app and place it anywhere you like. - Start the App
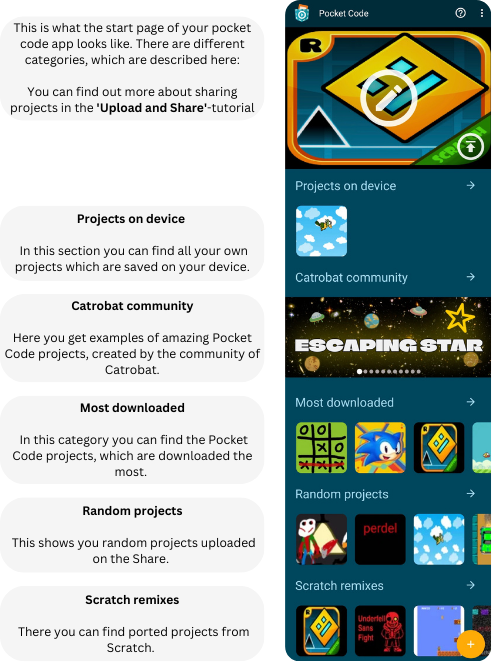
When you open the app, you see different categories:
- Create a new Project
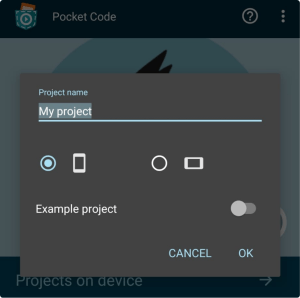
The next step is to actually create a new project. To do that, you can press on the yellow plus-Button at the bottom right corner. Now you have to enter a project name and select whether your project should be landscape or not. By pressing “OK” the project is created.
- You made it! You created your own new project.
Now you have installed Pocket Code and know how to create a new project. Now you can start programming!
To do this, you need to know how to create a new object in a project. Have a look at the New Object-tutorial, where everything is explained to you step by step.
You must be logged in to post a comment.